This is my first step-by-step post using our local movim microblog rather than imgur. I’ll upload it to imgur later as a backup but I’m seriously impressed with movim, very glad to have a noncorporate place for my projects. Let me know if there’s any issue with the link.
This is another quick one but at least I remembered to take pictures for most of it. I don’t enjoy oil painting as much as I do photobashes and other digital art, but it’s still a lot of fun in the right moment. I needed a picture frame for a recent one, to complete a gift to a relative. It was on a stretched canvas, rather than canvasboard, so the frame had to be deeper than normal. So decided to just make it from scrap lumber I had squirreled away.
I started with this stuff. These 1 ½” by 1 ¾” boards were part of a kind of disappointing haul I got from my local Everything is Free page. I don’t remember what it was I thought I’d find there, but by the time I got to it, all that was left was this tangle of busted-up boards from inside some kind of homemade builtin cabinet. They were cracked from their demolition, and full of wood screws, but I took them because there was still plenty of good material and I think I wanted to justify the trip.
I pulled all the screws and used them in another project, and when I went looking for material for the picture frame, they were pretty much perfect. Plenty of material, and I didn’t have to worry I’d use it for something better. The painting was of a rustic cabin, so the frame was going to be a bit rustic anyways, so a little battle damage was no big deal.
I measured and marked them based on a picture frame my grandfather had made (I would have used it instead but it wasn’t deep enough for the stretched canvas). I cut them to length, then down to 45 degrees on my miter saw (it makes squaring up lumber and doing corners absurdly easy, I used to do them all by hand and getting them to fit was much more art than science back then.)
Once I was looking at it, I realized the frame was a bit too thick, and decided to remove about half an inch in depth from the four pieces. This would be quick work on a table saw, but I don’t have one, so I marked a line and used the band saw. Then I sanded up all the sides on a belt sander until they looked good. There was a bit of stain left in deep spots from the original project, and I tried to keep some of it – I like a little character and history from the life of the piece. This wood was a part of someone’s home, they knocked it out with a sledge hammer, a weird goblin man came by on trash day and took it, now it’s a picture frame hanging on a wall.
Then I had to use the router to notch the back of all the pieces to hold the actual canvas. My router was a recent junk store find, it’s the old craftsman kind that’s a hand router bolted to the underside of a little fiberglass table. I screwed it to the workbench over the lathe, down on the far end, since its out of the way and that’s my heaviest workbench. I have plans to rewire the router, so you can turn it on and off with a proper tool switch, like I did for the drill press, but I haven’t done that yet, so turning it on meant reaching underneath, feeling for one of the handles, finding the trigger and the locking button, and setting them, at which point it begins to spin. It’s awkward and I wouldn’t want to have to do that in an emergency.
This was my first time really using a router on my own projects, so it wasn’t quite as pretty as I’d like, but overall it looks fine. I definitely want to replace the small, two-part fence with a taller one that runs end-to-end and gets closer to the blade. That would reduce the piece’s ability to wobble when its only braced against one of them.
Once the notch was cut I found the 45 clamp didn’t work that well so I stuck each joint together with a big dab of wood glue and a couple small dabs of super glue. The super glue gives you just enough time to get the pieces where you want them, and sort of acts as the clamping force for the wood glue, which takes much longer to dry.
Once it was dry, I stained the frame with Sedonia Red, it came out a sort of pink color but I think it’ll be a good fit for the white cabin with red trim in the painting, and the recipient can always hit it with a second coat of a darker stain if they choose.
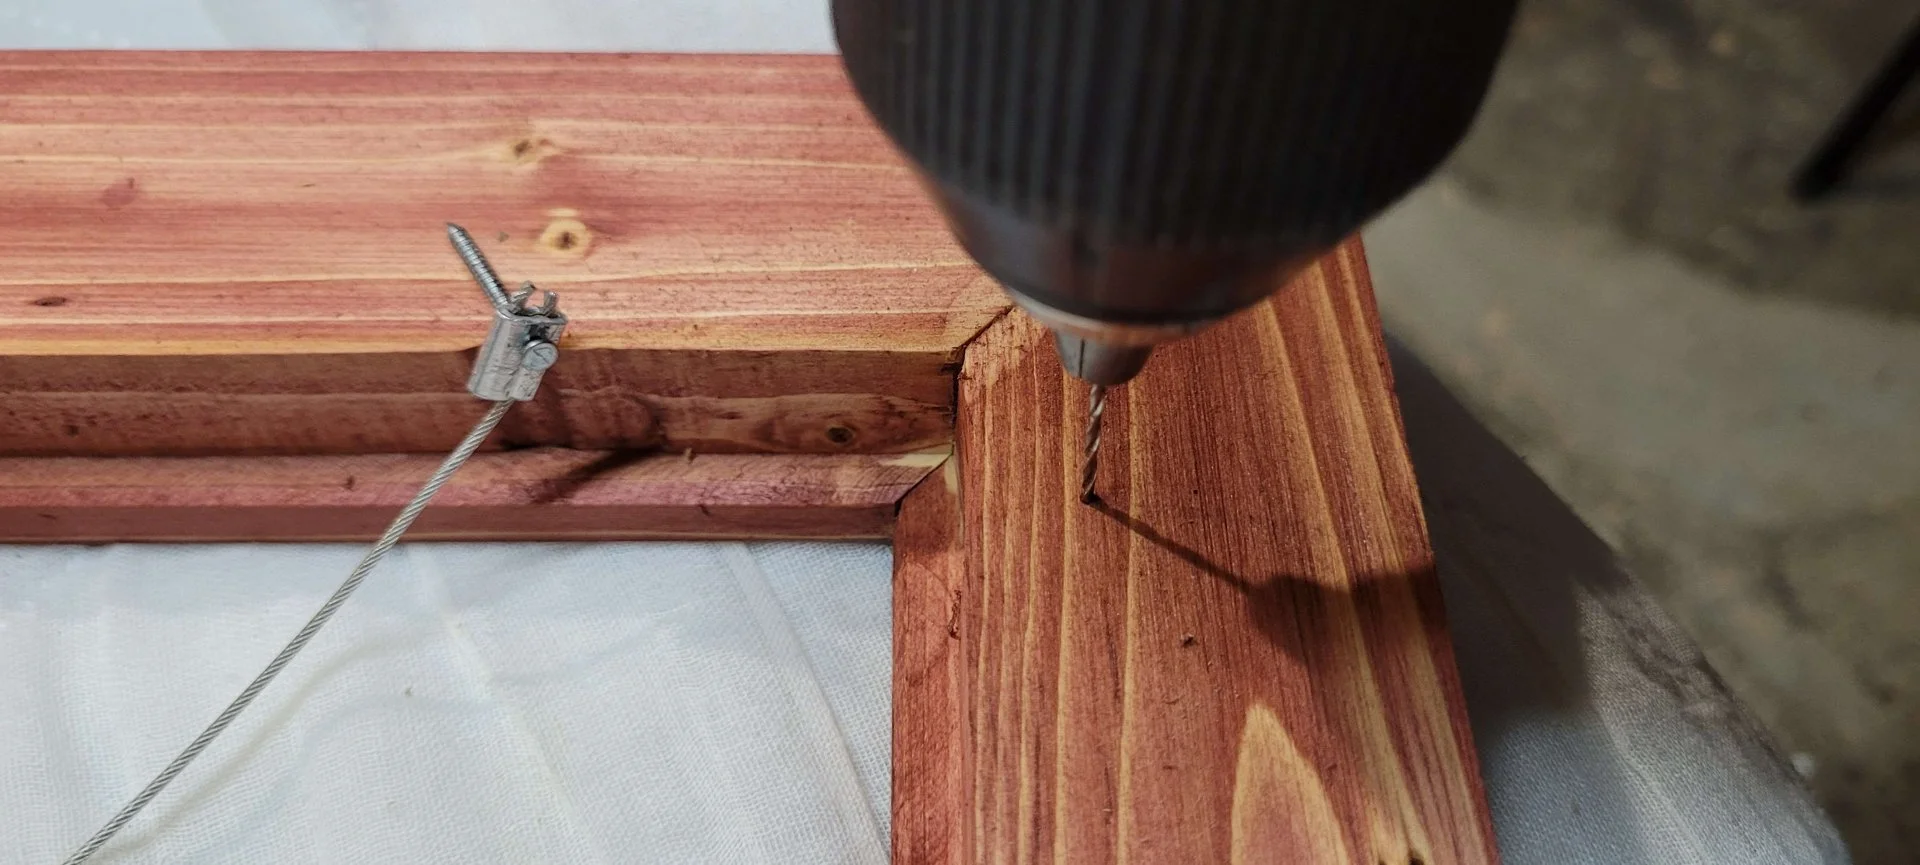
The last step was to add a cable to the back. They make little metal picture frame hanger things, and I thought about just cutting and bending one from a soda can, but to be honest, I kinda hate those hangers. I don’t think they work well and they feel unreliable to me. Usually I just use a strand pulled from some damaged CAT 5 wire, but this time I happened to have this metal cable left over from… somewhere? I honestly can’t remember what it came from. But it’s the sort of thing I keep because it doesn’t take up much space and it’ll be useful eventually, and sure enough it was! The loops had already been cut, so I just drilled a hole through the little aluminum clamps at either end, used the vice to squeeze them down on the wire a little extra, and used them to attach the cable to the painting. I measured both holes from the top, and predrilled them with a thin bit to make driving in the nail easier (since I didn’t want to break the picture frame.
As a very last touch, I cut a tiny sliver of wood and glued it into a notch where the miter saw ripped out a bit of wood at the top left corner. A little stain blended that back in nicely.
Overall, not bad for my first picture frame. It’s a little rough, but it’s supposed to look that way.


Nice to see / read. The super glue trick is nice to know. I also wanted to mention that the collection of pictures on the bottom is broken when you open them on movim.slrpnk.net
Good to know, broken how?
The summary pictures below
Weird, thanks for letting me know, I suspect that’s a movim thing but I don’t see it in my end. I think they’re still doing updates so hopefully it’ll resolve soon. I’ll get it uploaded to imgur today or tomorrow too